Fitting IRS suspension
|
Out with the old swing axle now and in with IRS! As well as the handling benefits, it is a requirement for the Porsche 5 speed transmission. Starting with a jig I have made up from the 944 rear subframe which came with all the trailing arms and brakes that I am fitting. |
I have started clearancing for the IRS brackets, this is not much fun! You can also see eh 944 adjustable trailing arm, although no I am going with coil-overs they won't be much use, I'll keep them anyway. I am going for coil-overs now because the longer IRS torsion bars now won't go into the chassis with the body on, although I did have it in my long term plans anyway... |
|
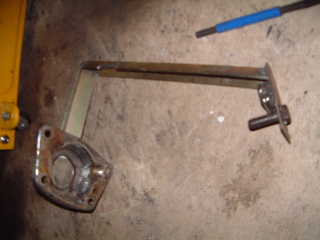
I have decided to use the Porsche spring plate covers cut down, they give the spring plate more support as they are longer. As I am not using the torsion bars this extra support is needed. |
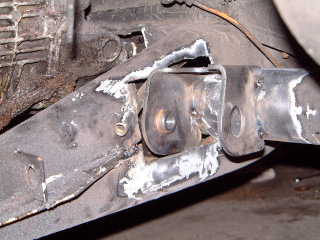
After I tack welded the first bracket in I realised that something wasn't quite right. It looked like the bracket was too far towards the centre of the car. The problem was that I had made the jig from the 944 rear subframe, this does not have any spacer washer next to the inner bushing and I had failed to take these into account! You can make out some padding I welded onto the jig to push the bracket back into its correct position. |
|
Here is the second bracket tack welded into position. |
Here is a partially dis-assembled 944 adjustable spring plate. The outer nut is eccentric which allows height adjustment. The other one is just for locking the assembly together. |
|
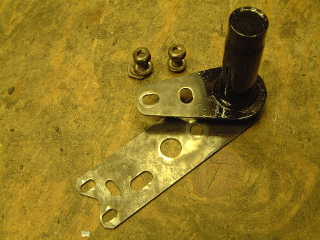
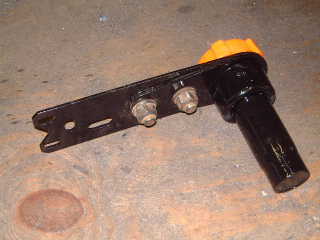
Here's the finished spring plate, stripped and painted with POR-15 and fitted with new bushings. Urethane versions with a VW inner and Weltmeister outer (from Pelican) for the cut down 944 spring plate cover. |
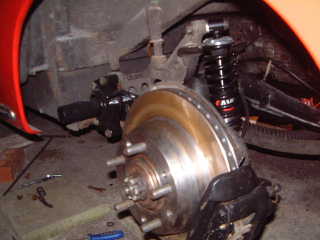
Before I finished welding in the IRS brackets I wanted to do a quick fit up of the suspension to check the positioning, also giving me an idea of clearance for the coil-over dampers. I will have to relocate the lower damper hole to give a bit more clearance for the damping adjustment knob. |
|
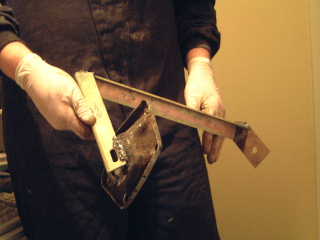
Here you can see the cut down cover, I have now welded up the 944 spring plates so I could remove the adjusting bolts which rubbed on the shock tower. They wouldn't have any adjustment with the torsion bars removed! |
Here is the finished rear end in a fresh coat of POR-15. |
|
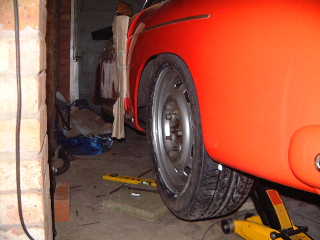
Finally, I have fitted up the rear suspension! This gave me hte chance to trial fit the wheels and make sure the offset was correct, they could have been made for it! |
I will have to cut down the bump stops and fit limiting stops to stop the wheel from dropping down too far and popping the CVs with the trans in its new raised position. I hope to get the ride height so the top of the rim is level with the top of the arch. |
|
Just about there. One problem has arisen though which I wasn't expecting. Due to my chassis being quite early, the shock towers are of a different (more bulky) design so the trailing arms foul on them when you get low. Future mods will be to notch the trailing arm so I can go really low but for the moment I will live with what I get. There is absolutely no way I am touching the shock towers as I rely on their strength to support the weight of the car now! |
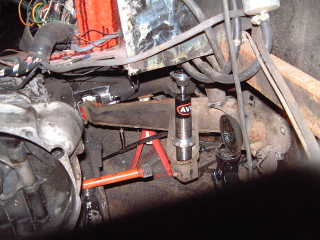
This is the AVO shock I bought, 22 point adjustable damping. |
|
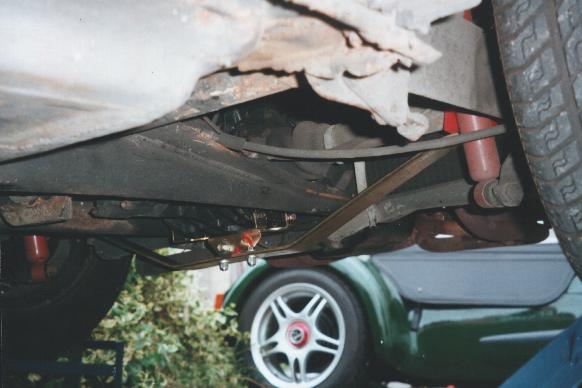
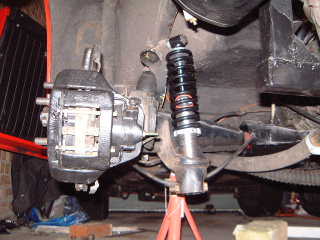
And fitted up to the rear suspension |
Everything clears, just some use of spacers needed. A lot cheaper than some of the kits offered by several companies! |
|
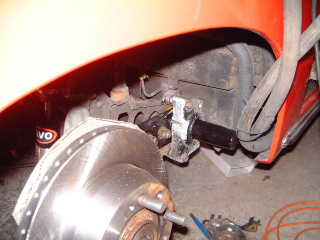
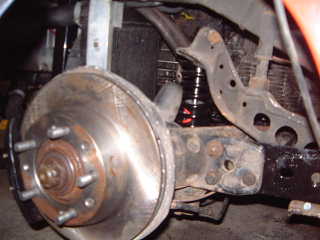
The offside fitted, with radiator just fitting in behind the CV and in front of the new engine mount. |
 |
 |
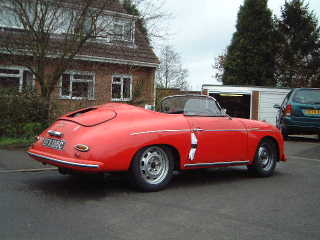
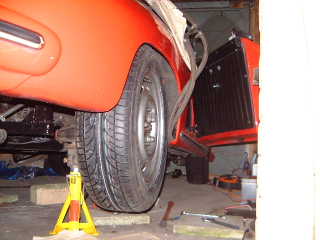
From the above and left photos of the first test drive
you can see how much lower the car now sits! I will need to do some
settign up now to get it all level. I will raise the rear slightly as
it is sitting just above the bumpstops and I don't want them to be my
suspension! Just the front brakes to go on now to get the matching wheels
up front...
|


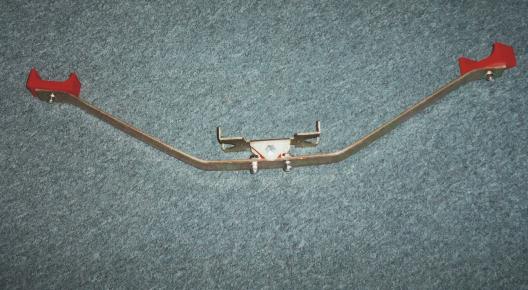
I recently fitted a camber compensator to the rear suspension. This has definitely improved the feel of the car, the suspension feels more positive and the car is generally better as the rear geometry is maintained eliminating the infamous positive camber effects. The instructions I had read from the web said that you had to drain the oil before fitting the unit as the bolts went into the transmission, as I had previously seen inside and there was an O-ring seal here I didn't bother (maybe this is just fitted in later cars? All in, it was an easy job, my biggest problem was finding some car ramps as the car has to be level for fitting!