Libra Build page 3
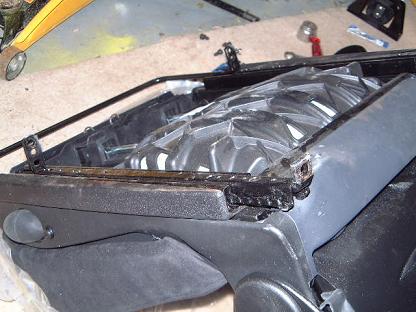
The Recaro seats were a bit high for my taste. As they are a design for Honda, the bolt spacing on the seat base was different to the universal design so Recaro supply an adapter bar to attach the seat to the runner, which unfortunately adds more height! I ended up drilling the extra hole into the runner and then cutting the rear part of the runner base fixing so the seat sits lower. As fitted without this mod, the slide lever is touching the top of the raised section of the Libra floor. With the rear lowered, the bar is angled upwards and clears the floor nicely. |
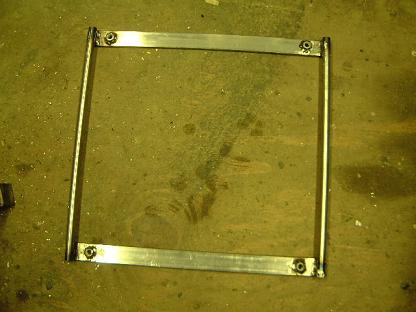
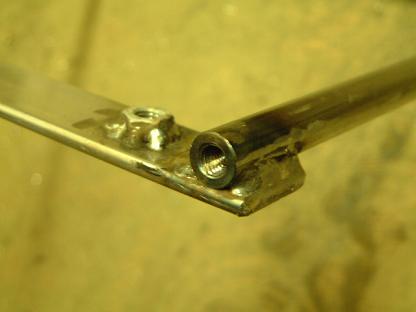
As part of the 'universal' subframe fitting kit, you get two bars with tapped ends and two plates. The bars fit lengthways to the runners and I welded the two flat plates underneath the bars. There is a 400mm spacing between the runners. Even though I am using the lowest hole in the front of the runner and the highest hole at the back (lower ones were cut off to reduce height, remember), there is enough compliance in the runners to accommodate the slight angle they are fitted at. I then welded some nuts onto the top of the base of the new subframe to that fixing in the car will be just a case of bolting up through the floor using spreader plates. They were then painted in satin black hammerite... |
Captive nut and bar welded to the cross connecting base bars. |
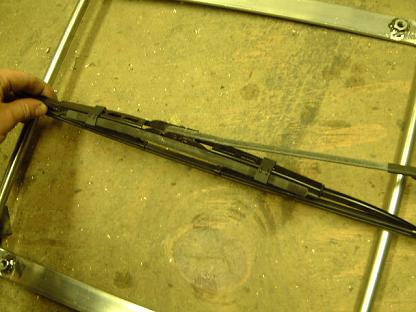
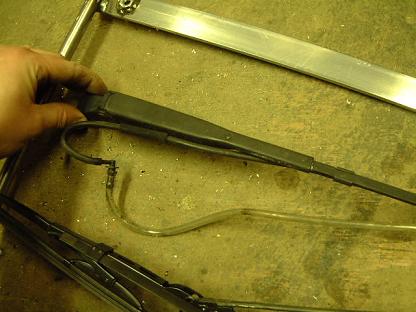
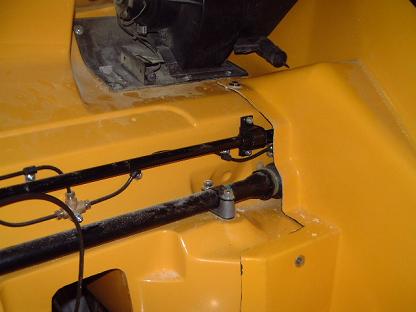
For some odd reason, I've always wanted to fit this style of windscreen washer on a car. I've seen them on a few sports cars and I'm sure they must work much better than fixed nozzles on the bonnet/scuttle. It is basically a spray bar which clips onto the wiper blade, there are three holes along its length and a final one angled at the end. I got these from a Peugeot 405. |
The rest of the system, the rubber hose is clipped onto the wiper arm and goes through the bodywork via a 90 degree joiner. |
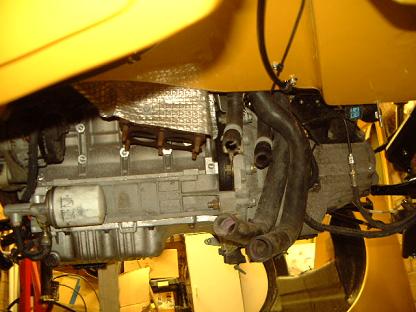
You can see the cam cover is extremely close ot the engine frame. It is normal practice to cut the end of the cone for clearance. One thing I never saw anywhere in manuals/sites is that you have to fit the cover after the engine as it doesn't allow clearance for the ally donut mount to slide down onto the studs. |
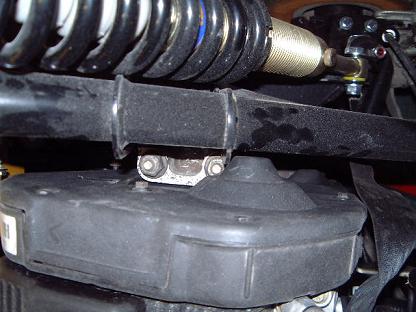
Gearbox mount needs a spacer making. I'm not happy about tightening it up like this as the rubber center would be pulled out of the outer part (I've also fitted a new rubber since this photo as I thought it was knackered, but it seems the central threaded part of the mount is only actually bonded to the lower rubber part, not on all sides as I thought). |
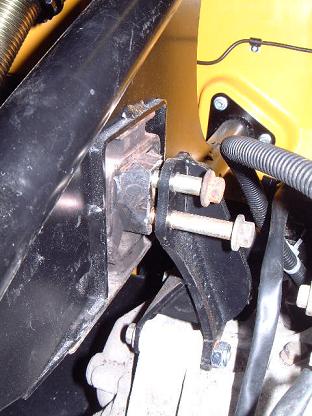
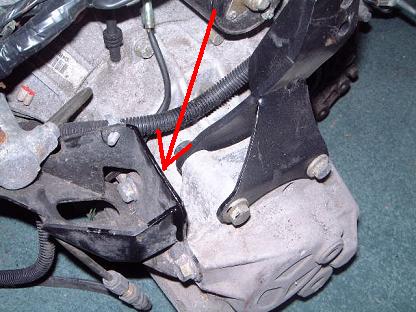
Part of the MG bracket needs cutting off to give clearance for the engine frame. It doubles up as the MG engine mount and hydraulic clutch slave cylinder mount. Part arrowed was where removed section was. |
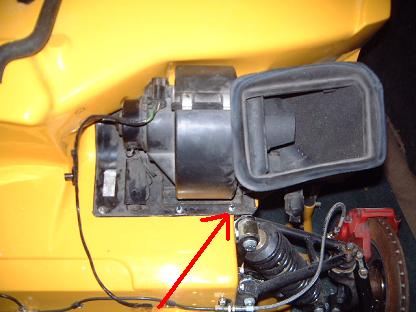
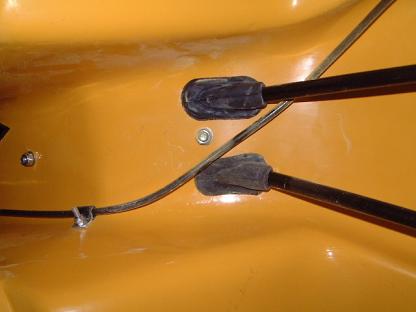
Heater blower fitted, the arrowed fixing was at a slight angle to fit. I drilled and tapped the body as three bulkheads met at this point and clearancing for a nut would have meant weakening the structure to much and would have been impossibly fiddly!
|
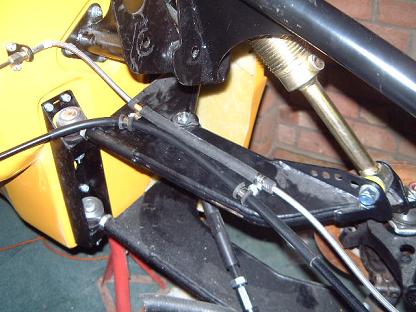
Handbrake fitted with correct cables (from Martin at Reyland Automotive) with correct rubbers. |
I thinned down the fibreglass at the flange to get a nice thin perimeter so the seal fitted snugly and won't leak.. I was lucky with the brake line positioning! |
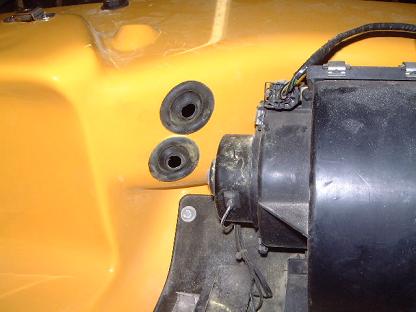
Heater pipe grommets fitted in the front bulkhead, 2 35mm holes were required. I used my 25mm holesaw and the dremel to open them out fro a snug fit. Again, I thinned the fibreglass down as most grommets can't take the thickness of 'glass panels) |
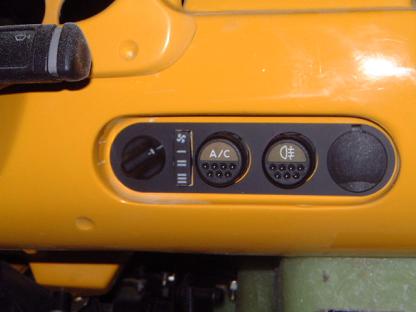
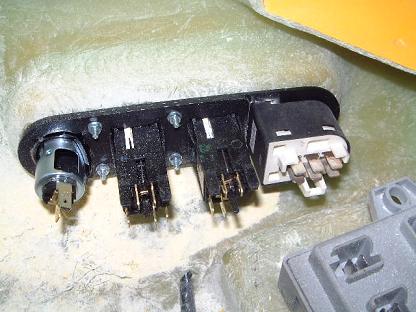
Switches fitted. I have the metro steering column with integrated hazard switch so got a 12V socket from GTM to fill the remaining hole. Note that I had to open out the square holes in the backing plates to take the socket. |
Rear of the panel, not very interesting really! I should get the vacuum cleaner out soon, dust is starting to gather! |
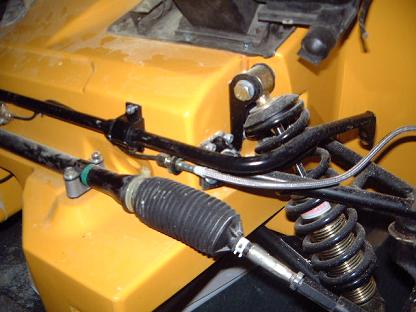
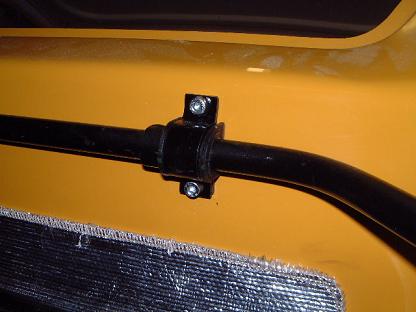
Front anti-roll bar fitted. I believe this is a new design, not sure what they changed but the droplinks I was given were way too short. |
Fun and games tweaking the front hard brake lines I had already fitted,,, |
Rear anti-roll bar bushing |
|
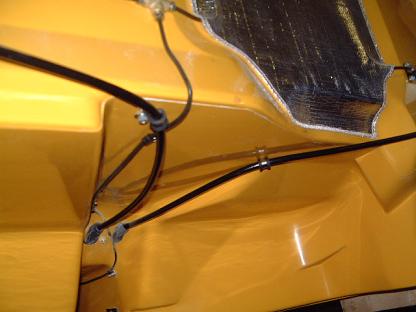
Handbrake cables fixed to body above fuel tank |
Handbrake and brake cable fixed to top suspension arm |
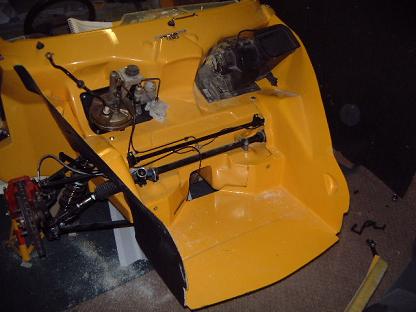
Now that the front anti-roll bar is fitted I can get on with fitting the front bodywork! |
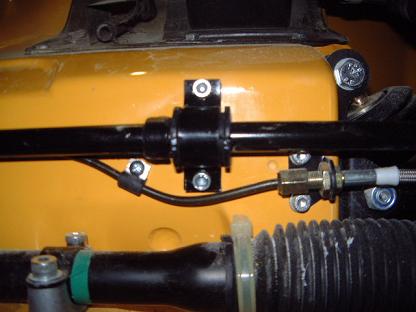
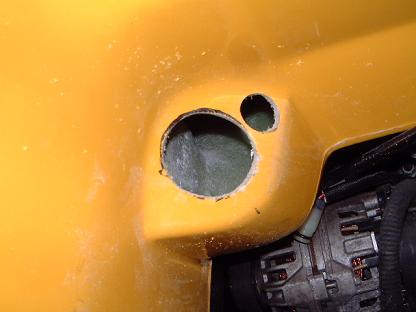
Close up of how anti-roll bar fits through bodywork. |
View of the standard MGTF water hoses, should be easy to connect up to the main aluminium pipes going through the tunnel! |
|
I plan to use a performance flat panel filter in the stock airbox but make a cold air induction pipe to feed it from the side vent. The aftermarket boxes would cost upwards of £300! |
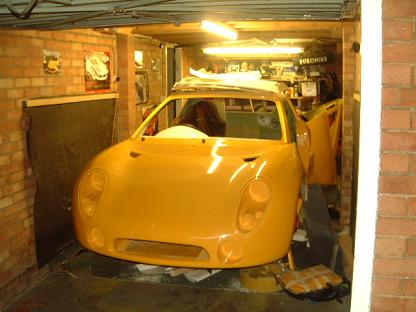
Couldn't resist mocking up the front end on the body, starting to look like a real car now. |