Libra Build page 4
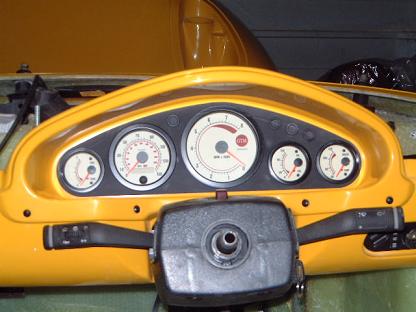
Instruments all fitted. Pretty self explanatory really! |
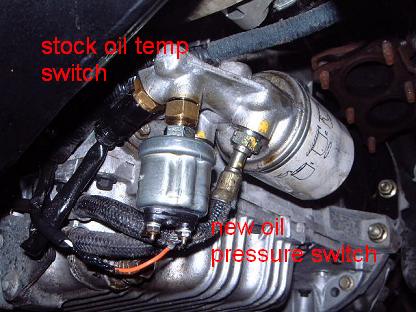
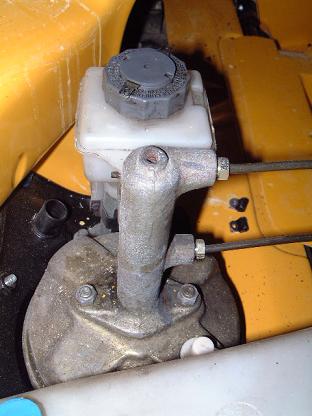
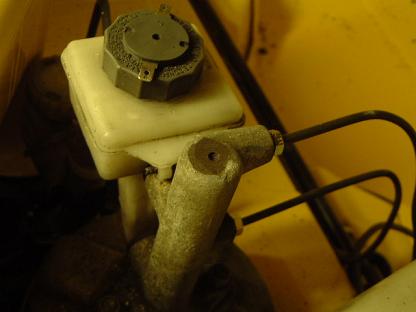
To be able to fit the replacement oil pressure switch, I had to swap the oil temperature and pressure switch locations around as the new switch is so big. I then had to extend the wire slightly to reach the new sender. THIS DOESN'T WORK! THE ENGINE STEADY BAR HITS THE OIL PRESSURE SWITCH IN THIS POSITION. I HAVE SENT THE CASTING TO GTM TO BE SUITABLY MODIFIED. |
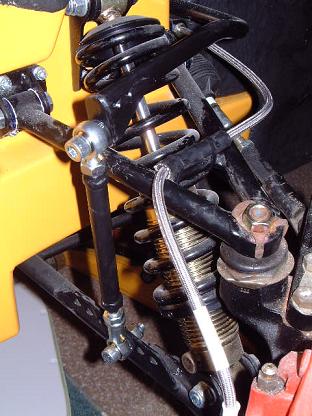
Front ant-roll bar links fitted... |
|
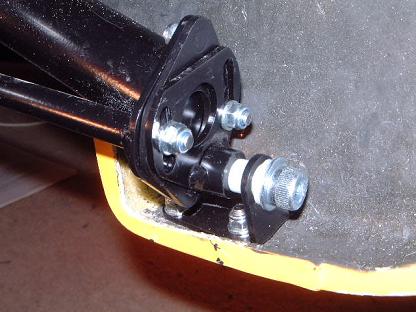
Rear body hinge fitted |
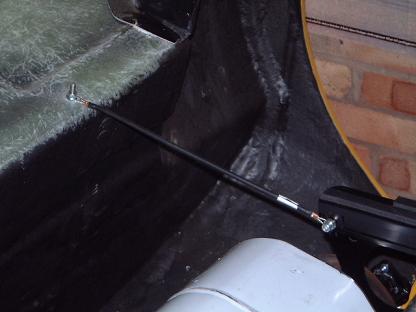
Stay wire for the rear clamshell fitted between the boot back and support frame. |
The top bit doesn't look like it's doing much! |
|
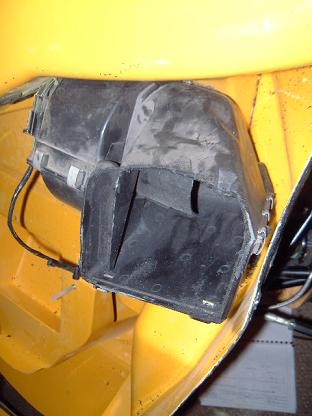
Heater inlet cut to clear bonnet vent |
Bonnet hinge. View from inside the radiator ducting |
View from behind the driving light, ahead of the front wheel |
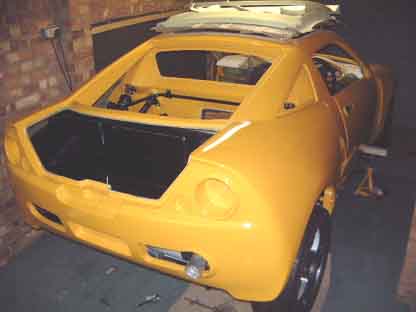
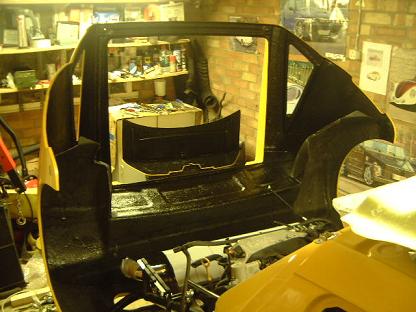
Looking like a whole car now! |
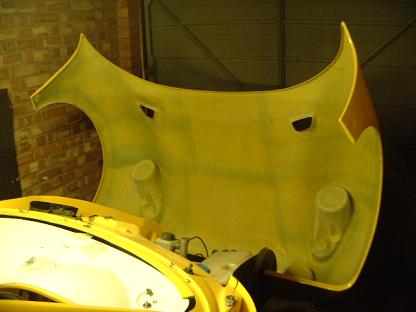
Front opened, I am waiting until the wiring positions are known and I have fibreglassed fixings to the underside of the bonnet before rubber-coating it. |
|
Rear clamshell rubbercoated in the wheel wells and painted in satin black everywhere else. I also did the boot inside, the front radiator and spare wheel panels while I was at it |
Luckily, as my engine is quite new I get the benefit of an oil cooler. |
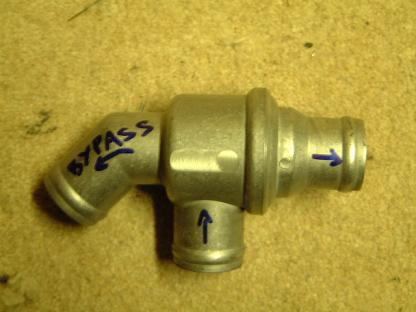
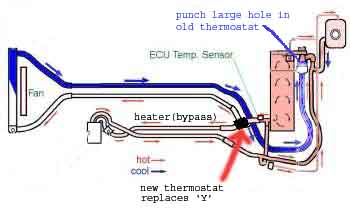
BMW E30 thermostat, supplied for 4 cylinder models with the M10 engine. Was about £15, a lot cheaper than all the aftermarket kits! It contains an 82 degree thermostat and will be plumbed in to the system as shown to the right... |
I also have the oil cooler on the bypass circuit behind the engine. |
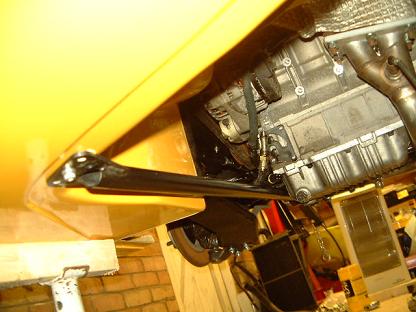
Engine steady bar in place. Positioning of this is critical as it determines the position of the exhaust in the cutout of the body. I jacked the engine into a position 5mm to high and drilled the holes for the steady bar, when fitted and the jack released, the rubber in the bushing compressed so that the tailpipe was then centralised nicely. |
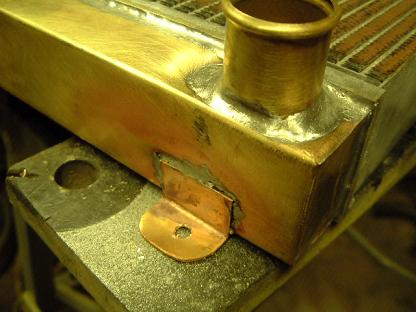
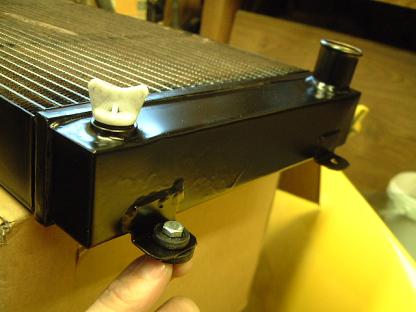
Offering up the new 3 core radiator in the ducting. I was surprised to see that for £160 it didn't come with any mounting brackets or even paint! |
I soldered on 4 pieces of copper as above to mount to.... |
using rubber tap washers on either side as insulation from vibration. The intake hole can then be slightly enlarged to take advantage of the wider radiator and all fitted up. An aftermarket fan is now required as there is only 50mm clearance between the radiator and the spare wheel carrier. It is painted using Hammerite satin black spray paint (note: I haven't painted the cooling fins) |
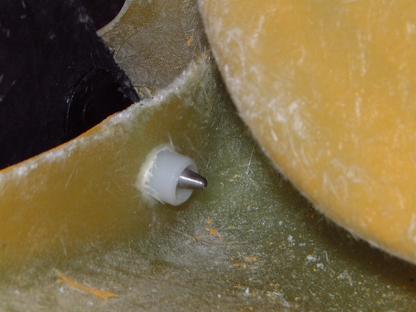
Fitting the boot was fiddly. I had to grind the hinge and fibreglass down to gain clearance for it to all shut properly as shown. I am postponing fitting the boot stay for the moment, at least until the rear screen is in so the boot clears it. I am also thinking about some lightweight gas struts that will lift the boot automatically with the alarm remote control. Any ideas for donors are most welcome! |
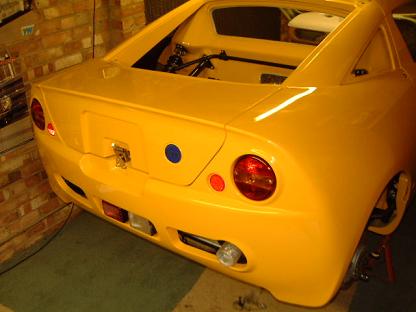
All rear lights fitted too. Still waiting for the loom though |
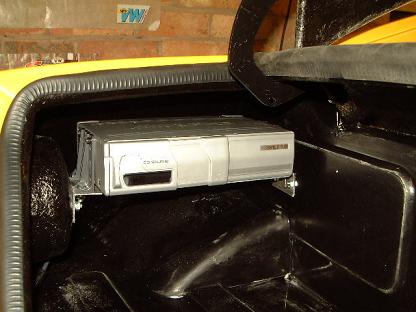
I've been wondering for a long time where to fit the CD changer (my head unit is purely a controller). I couldn't think of anywhere inside the cabin so decided on the boot but I thought I would lose a lot of what minimal space there is in there. Luckily, it just fitted in the side as you can see. Some simple brackets were made that go between the rear light fixings and the boot bulkhead. I might not be able to fit a set of golf clubs in now! Fortunately, I don't play golf. Yet... |