Libra Build page 8
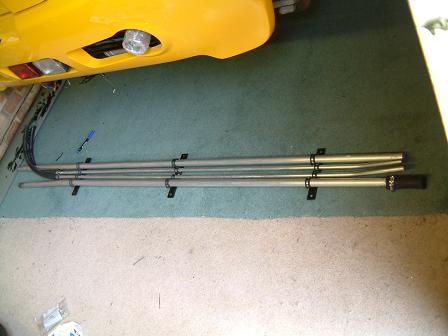
As I have the cable gear change I had to do the pipework differently to the manual. I decided to make all of them into a removable sub-assembly. There are 3 plates that have been drilled and tapped and the whole lot screws into the bottom of the monocoque. The plates sit in an existing recess and I tapped the body for M8 which means I can easily do it single handed, I will add some nuts inside the car for a bit of extra security. |
Fitted in place with stainless button head bolts. The main pipes needed to be bent down slightly to miss the fuel tank. |
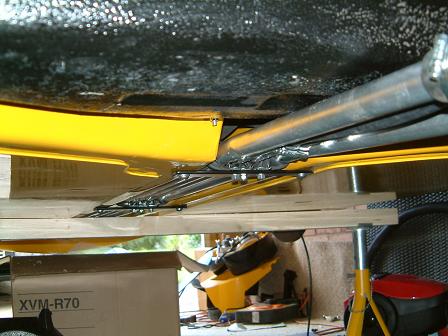
Rear end of the pipework, here you can see the BMW remote thermostat fitted in place. |
And the front |
Wheel arch liner has turned out quite good, I just hope I have enough clearance for the wheels! |
Trying out a seal and trimming down the headlight covers. The front end is drilled and tapped for M4 button heads. |
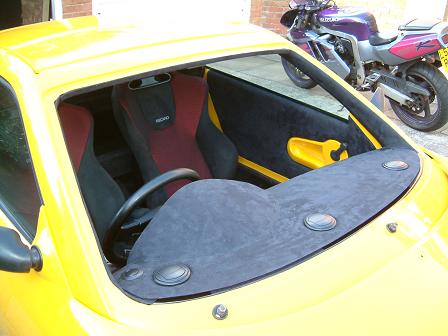
Copper sheet bonded onto the underneath of the dash top to form a ground plane for the hidden aerial in the A pillar. |
|
Both headlight surrounds painted in matt black. I think it gives a nicer overall look and is more 'finished'. A benefit of using a rubber seal is that you don't get the shiny ring from painting the edge of the cover which somehow never looks very well done. |
|
Close up of a finished light assembly, a U section rubber seal was used around the edge of the perspex and black buttonhead M4 bolts hold everything in position, hopefully properly sealed. Another benefit of painting the inner is better lighting with reduced reflections. I also fitted the rear headlight covers with a foam gasket and the same M4 buttonheads. |
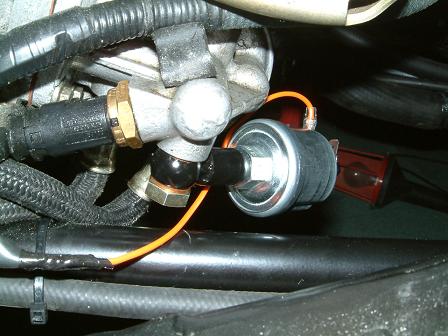
GTM don't cater for cars fitted with the latest spec of VVC engine fitted with the oil/water heat exchanger. The oil filter casting is completely different and GTM's solution is to remove this cooler and fit an earlier casting. When people often spend hundreds of pounds installing aftermarket versions there is no way I am removing one! In the end, my solution was to make a banjo fitting as above. |
Fitted in place, a good amount of clearance all around, but not enough that any old fitting would fit in the space available. Note also I have cut the oil pipe brackets to raise them clear of the engine steady bar. |
|
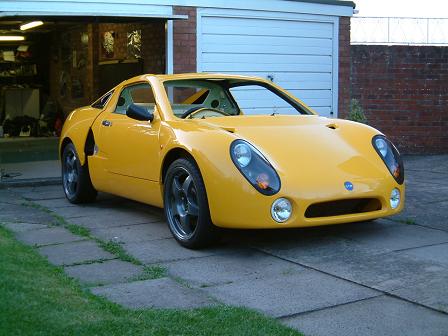
I'm happy with my colour choices now they can be appreciated together. |
 |
 |
Edges that are not covered by the hard trim panels have alcantara glued onto them so you don't see bare fibreglass |
 |
 |
Just about finished the interior! |
Obviously the door panels still need fitting... |
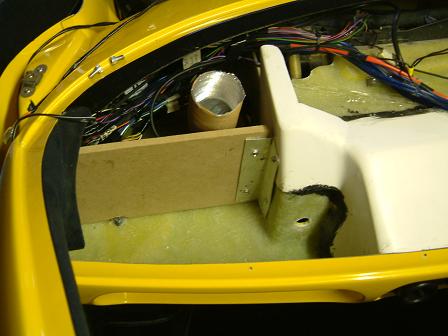
All cabling and the 5AS was neatened up with a bracket I made and tucked back as far as was sensible to maximise the room for a glovebox. The back was made from a sheet of MDF and screwed into position so that future access isn't impossible. |
|
I also fitted a small rocker switch for the interior light. Due to space constraints, a regular interior light with rocker switch won't fit in the normal position so I have used a slim boot light unit. The glovebox was trimmed with some automotive carpet I had spare form the Speedster. |
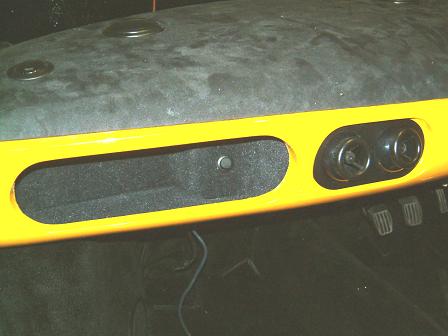
Stereo mounting is fitted pre SVA without the head unit to cover the heater, I just have to sort out some sort of cover for the steering column underside now. |
B pillar in position with grill, just waiting for seat belt top mount. |
|
Interior finished! |
Exterior finished. |
Just bleeding fluids and waiting for my engine relay harness from GTM. Once the engine is running I will get the windscreen bonded in, I'm waiting in case any of the wiring needs attention. |