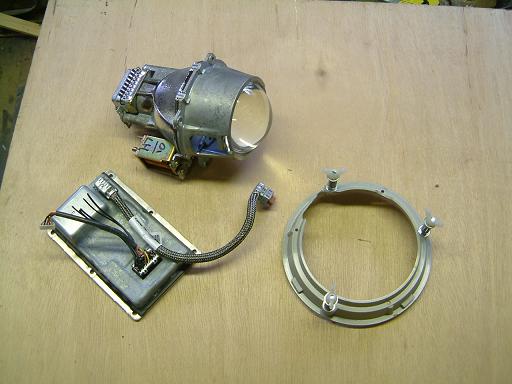
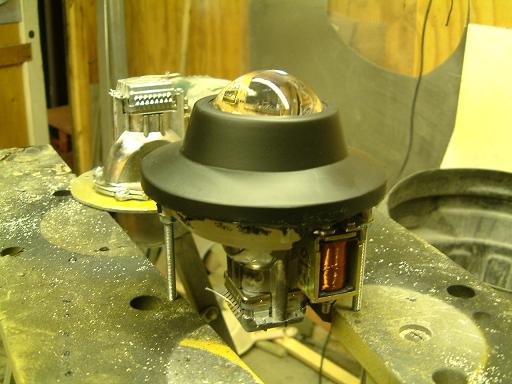
Here are the main components:
The bi-xenon projector unit, the ballast/ignitor module and the adjusting ring
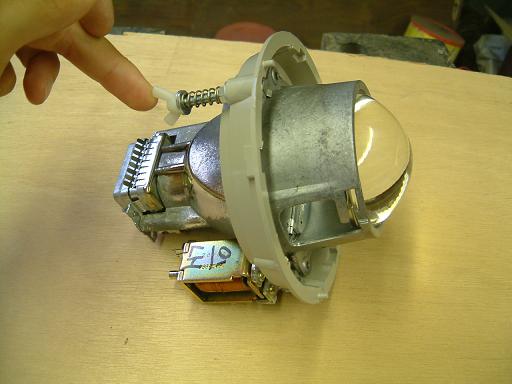
Test fitting the projector unit in the adjuster ring to see what I have to do to attach them together. Some clearancing is required.
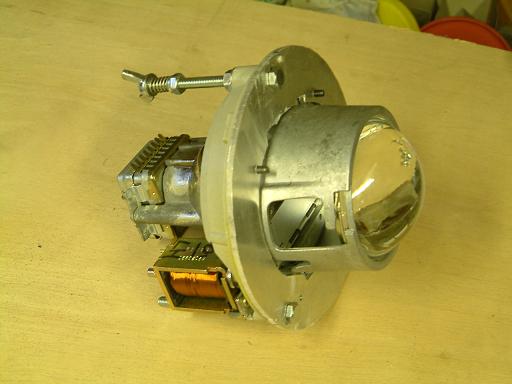
3mm aluminium plate was used as an adapter to mount the projector assembly to the adjuster ring.
Extra long through bolts become the adjusting points by using the original springs and nylock nuts to set the distance of the assembly from the mounting face.
Next step is to test fit them in the car, but that will have to wait at least until a weekend...
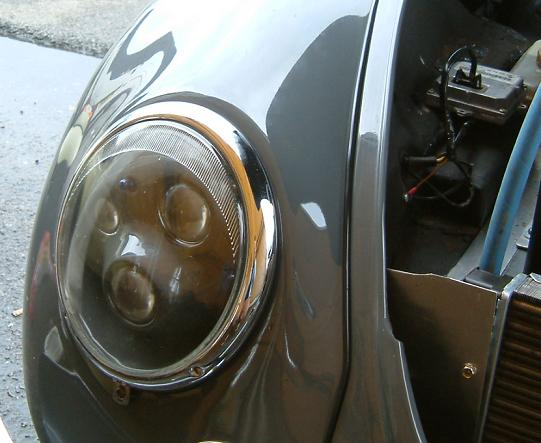
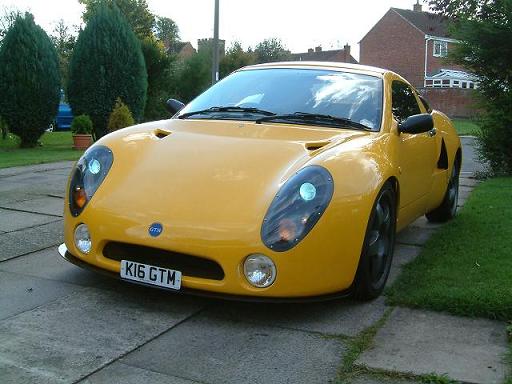
This is a custom housing made up by Marco Mansi to fit Audi TT projector assemblies into the standard 7" housing of a VW beetle. You can see the electronic module mounted inside the bonnet area...
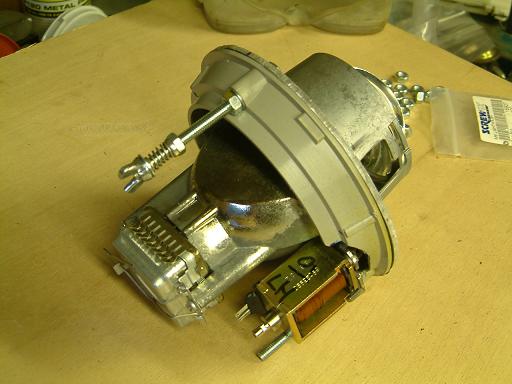
They fit with mm's to spare!
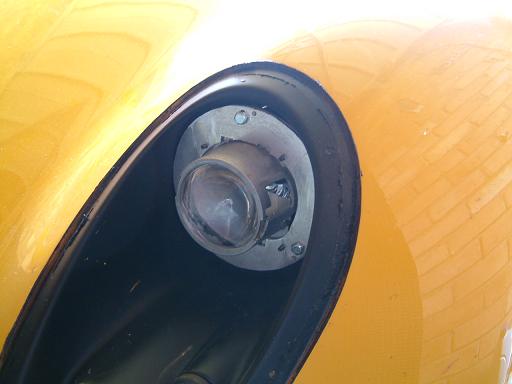
A cover 'ring' now has to be made up, a simple matt black cone in fibreglass should do the job.

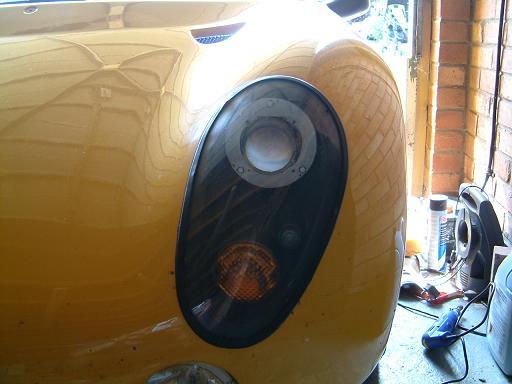
The rear just needed some clearancing and a new rear cover will have to be made. The adjuster rod next to the solenoid will be made into a non-adjustable point and under the cover for simplicity...
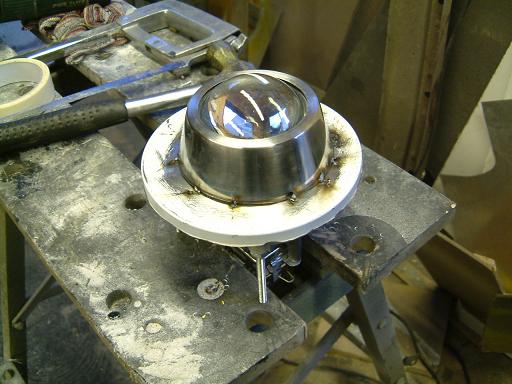
Shroud in progress, made from a pet food tin and paint pot lid! Should look good after painting...
Here's the finished shroud. I have been waiting until I could check that the lights worked properly before stripping the first one down and making a duplicate. Here is the first one properly assembled.
The shroud is held onto the base with sikaflex around the edge, if I ever have to take it off it should easily cut...
Xenons in and working!!! It has been a pain sorting out the wiring and I will probably improve this a bit more. The problem is that the bi-xenons only have one 'filament' and the main beam operates a solenoid which moves a metal flap. The problem is that a conventional wiring set-up switches between two filaments in the one bulb so there is a short delay between dip/main switching. I will have to find the 'always on' wire and connect this to a relay in the system so the light doesn't have to re-start when switching.
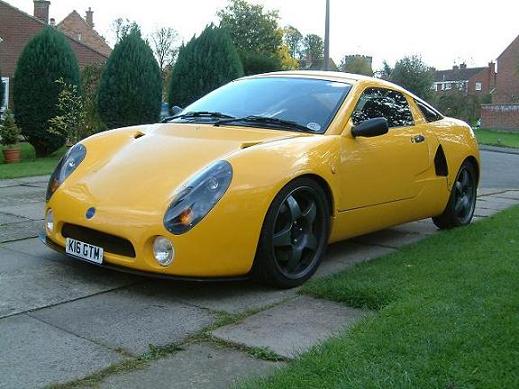
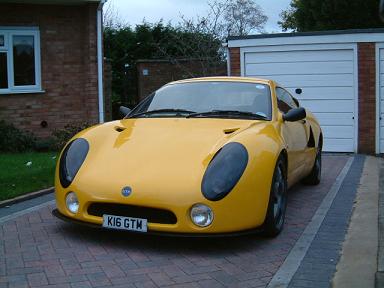
It definitely gives the car a different look. The new splittere seems to help high sped stability too...
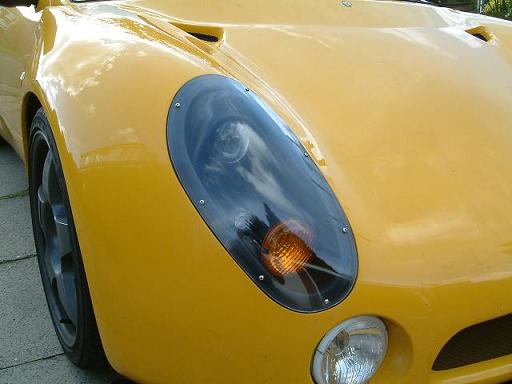
I'm also on about my fifth different way of sealing the covers...
Currentyl there is a 3mm thick foam strip aroundthe edge and the screws have an O-ring each between the cover and the body.
Here's the pattern from one of the headlights.
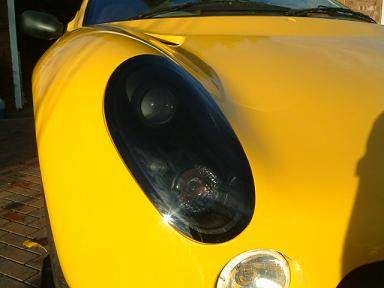
Latest version of headlight covers! Black band of paint around the edge which hides the rejel non-setting mastic. The headlight covers had to be trimmed down to size and reformed to perfectly match the contours of the body work. To do this, I use an electric heater on its side and balanced the covers on some pieces of wood, then when they had become nice and pliable I quickly duck taped them to the car, when they cooled the shape was perfect!
Whiile I was at it I also fitted clear indicators and LED sidelights which are a bright white to match the xenons better

I also squared off the splitter to it doesn't catch on anything less than a perfectly flat surface when it is tilted..